An Account in Ever Accounting is designed to track and record all financial transactions related to your business. By creating accounts, the system monitors money flowing in and out, ensuring an accurate record of every transaction, whether it increases or decreases your company’s funds.
Adding a New Account
Navigate to the Accounts Section
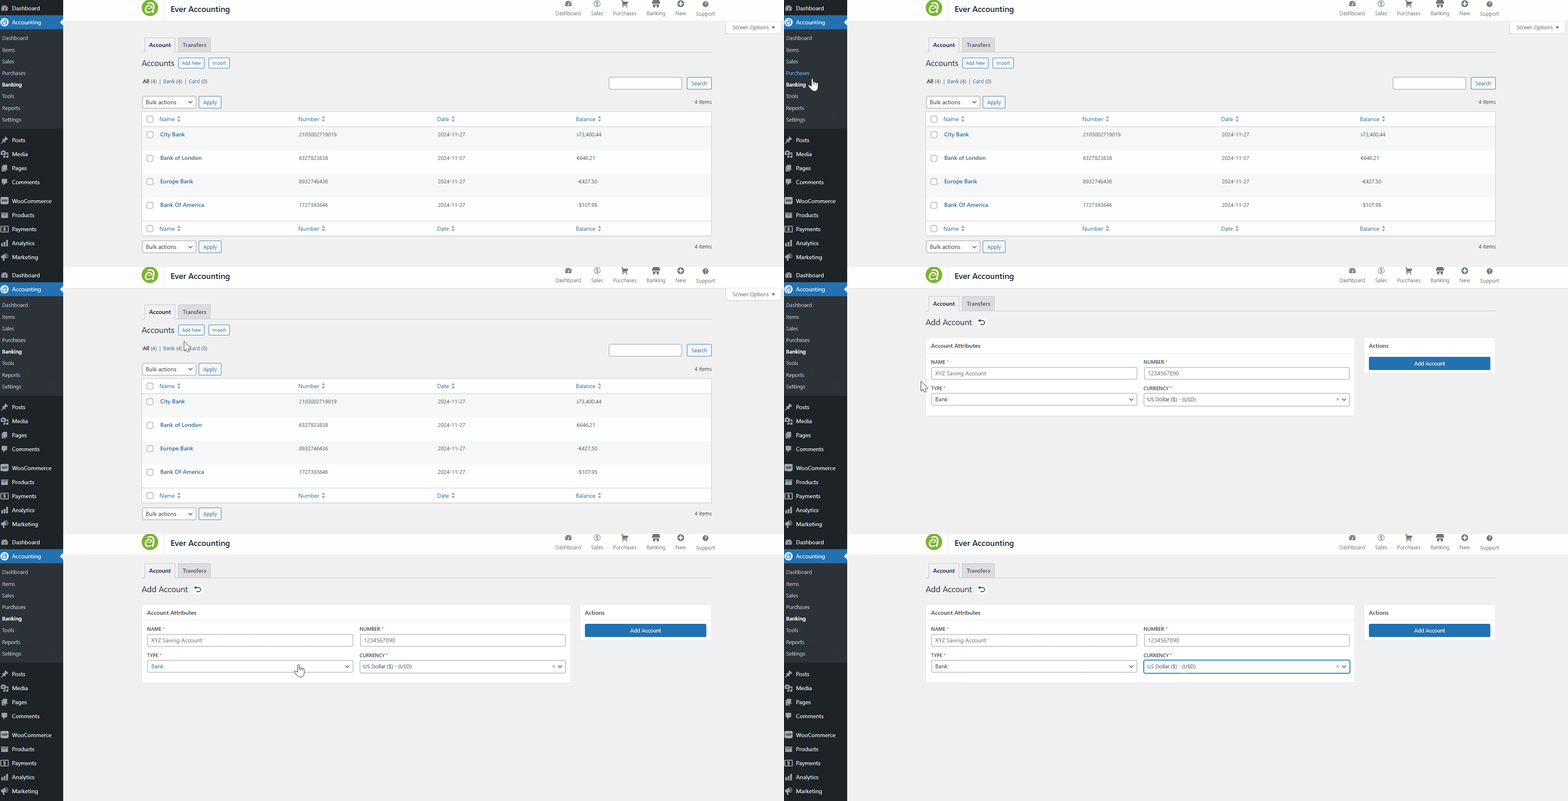
- From the Ever Accounting dashboard, go to Banking > Accounts.
Add an Account
- A form will appear where you can enter the details of the new account.
- Click on the Add New button at the top left of the Accounts page.

Required Fields for Account Creation
| Field | Description |
| Account Name* | The name of the account (e.g., “Business Checking,” “PayPal Account,” or “Savings Account”). Make it unique and descriptive. |
| Account Number* | The official account number or a unique identifier for internal reference. |
| Account Type* | Select the type of account (e.g., Bank, Card). This categorizes transactions appropriately. |
| Currency* | Choose the currency for the account. Only transactions in this currency will be accepted. |
After completing the required fields, click Add Account to finalize the creation.
Accounts Listing
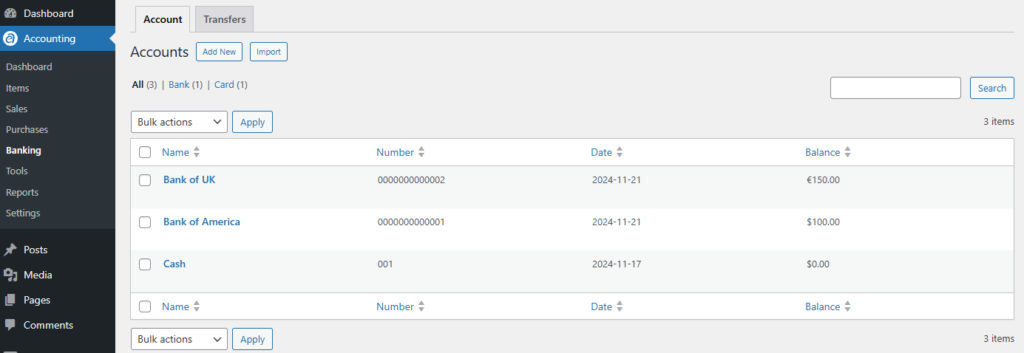
In Ever Accounting, navigate to the Banking tab under Accounting. This page displays a list of all the accounts that have been created.

The list displays Account Names, Account Numbers, Creation Dates, and The Balances for each account. Additionally, individual accounts can be edited or deleted as needed.
Account Overview
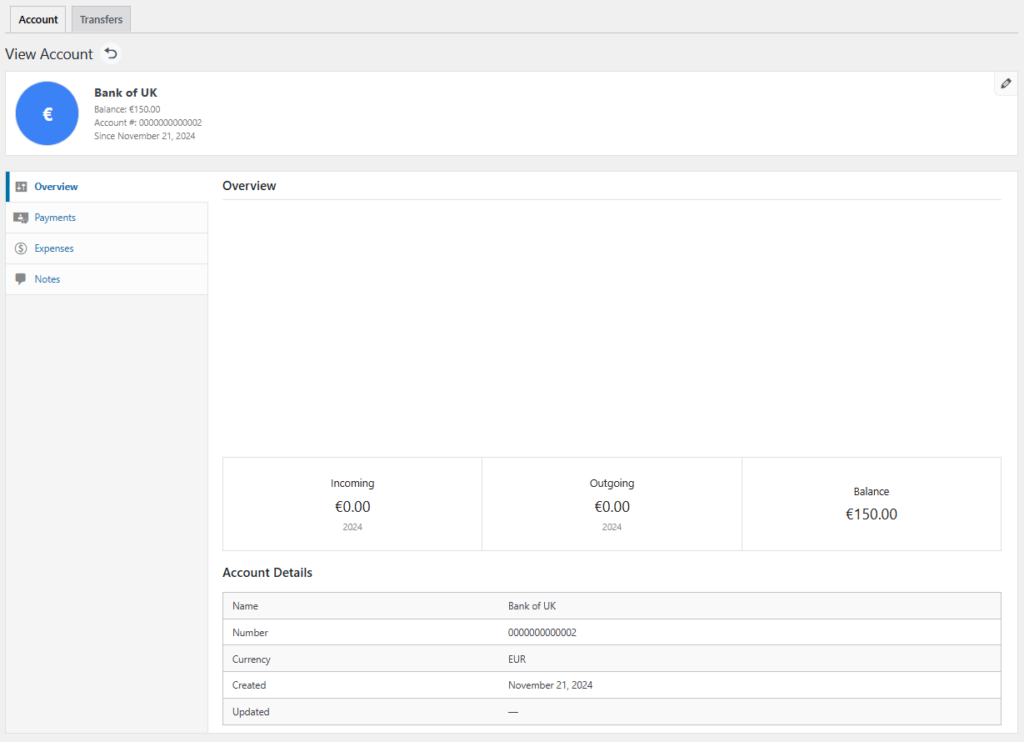
The Account Overview provides detailed information about each account. The layout is divided into sections for easy navigation and data management.
Navigation Tabs
- Overview Tab: Displays general account information, including the account name, number, balance, and recent activity.
- Payments Tab: Lists all incoming and outgoing payments linked to the account.
- Expenses Tab: Shows all recorded expenses for the account.
- Notes Tab: Allows you to add and manage notes or comments related to the account.

Tracking Financial Movements
Within the Overview Tab, you can track specific financial activities:
- Incoming Tab: Displays all deposits or credits added to the account, such as payments received or income from sales. These transactions increase the account balance.
- Outgoing Tab: Lists all withdrawals or debits, such as payments for bills, expenses, or transfers. These transactions decrease the account balance.
- Balance Tab: Shows the current account balance after considering all incoming and outgoing transactions.
Managing Accounts
From the accounts list, you can perform the following actions:
- Edit: Update account details as needed.
- Delete: Remove accounts no longer in use. (Note: Deleting an account is permanent and cannot be undone.)
- Bulk Actions: Select multiple accounts to perform batch updates, such as updating balances or deleting accounts.
Tips for Efficient Account Management
- Be Specific with Account Names
Use clear and descriptive names like “Main Business Account” or “Emergency Fund” to avoid confusion. - Track All Transactions
Record every income and expense in the correct account to ensure accuracy. - Review Accounts Regularly
Reconcile your accounts with bank statements to maintain accurate financial records.