We use accounts so that we can keep a record of money received and money paid out. In other words, by creating accounts, WP Ever Accounting can keep records of every transaction that can increase or decrease a company’s funds.

Fields Required to Add Accounts
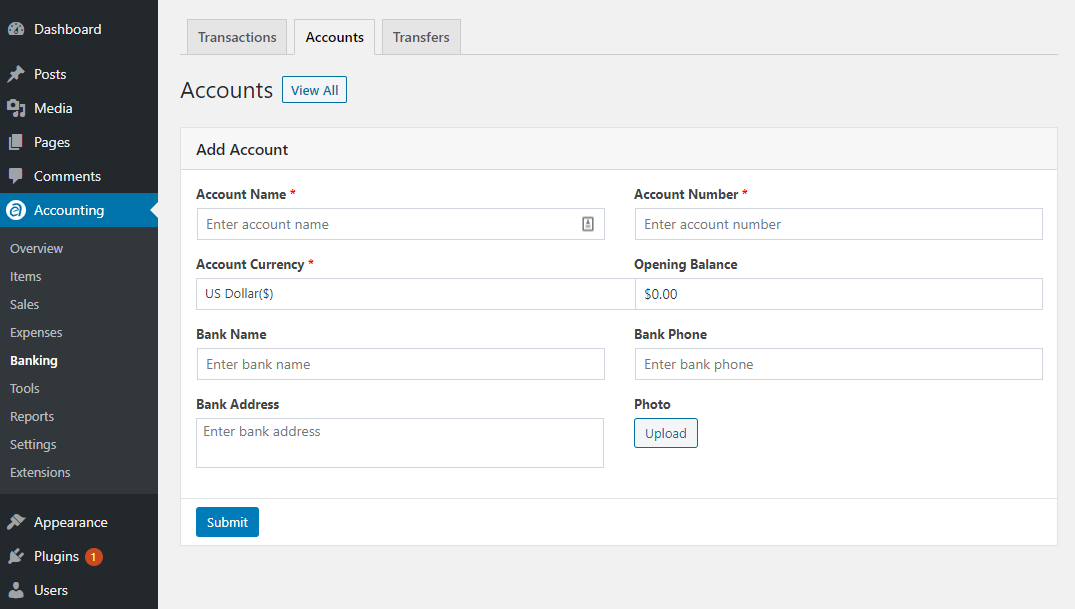
To add accounts, go to Banking. On the page, you will see an Add New button which will take you to another new page. There, you can add accounts by filling up the following information –
| Field | Description |
|---|---|
| Name* | Holds the account’s name. |
| Currency* | This is the currency of the account. An account will accept any transaction only in that currency. |
| Account Number* | The account number provided by the bank. |
| Opening Balance | This is the amount of money when a bank account is opened. |
| Name of the Bank | Name of the Bank. |
| Bank’s phone number | The phone number that is used by the bank. You can only add one phone number. |
| Address of the Bank | Address of the branch where you opened your account. |
Accounts Listing
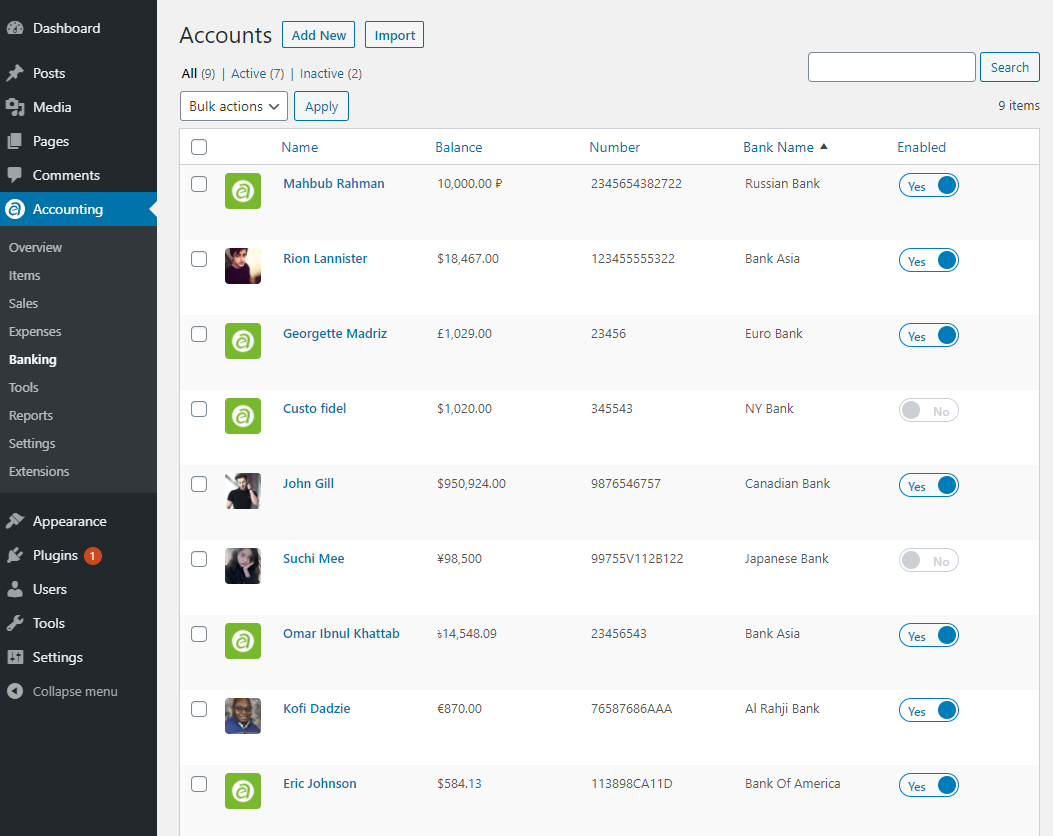
From the Accounting, click on the Banking tab. This is the page from WP Ever Accounting where you will see the list of created accounts.

The list provides the account names, amounts kept in each account, account numbers for each bank account, and the name of the banks. You will also see a button along with each account. With the help of this button, you can keep an account enable or disable. There’s another field ‘Action’ which you can use to edit or delete accounts separately.
View Account
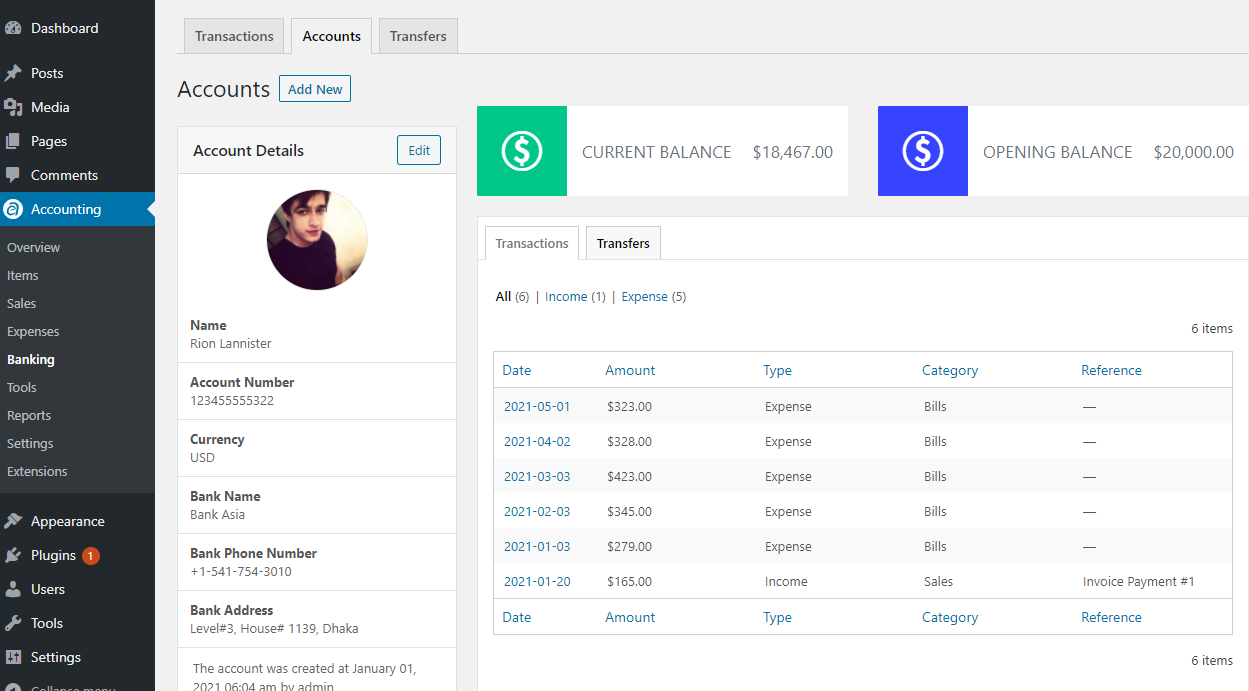
From the accounts’ list, you can view the profile of each account individually. Simply hover over any account’s name and click on ‘View’. By clicking on view, you will be able to see all the necessary information affiliated with an account. There you will find the information on the current balance, opening balance, transactions, income, and expense stories. In case you need to edit the profile of the customer, you can do it too.
