Invoices are vital for maintaining accurate sales records, tracking product or service quantities, and ensuring legal compliance. Ever Accounting streamlines the invoicing process, making tracking, managing, and customizing invoices to suit your business needs easy.
Step-by-Step Guide to Adding Invoices
Follow these steps to add expenses in Ever Accounting:
Navigate to the Invoices Section
- From the Accounting menu, go to Sales > Invoices.
- This will open the Invoices page.
Click the Add New Button
- On the Invoices page, click the Add New button at the top left.
Fill in the Invoice Details
Provide the following details to create the invoice:
| Field | Description | Example |
| Customer* | Select the name of the customer from the dropdown menu. | John Doe |
| Issue Date* | Specify the date the invoice was issued (default is the current date). | 2024-12-22 |
| Due Date | Set the payment due date (default is 30 days from the issue date). | 2025-01-21 |
| Currency* | Choose the currency for the invoice (default is your system’s base currency). | USD |
| Invoice Number* | A unique identifier is automatically generated based on your settings. | INV-1001 |
| Order Number | An optional identifier for the purchase or order. | ODR-1234 |
| Exchange Rate* | Specify the exchange rate for currency conversion, if applicable. | 1.25 |
Note: Fields marked with an asterisk (*) are mandatory.
Adding Items to the Invoice
The total cost of the invoice is determined by the items added. Follow these steps to include items in the invoice:
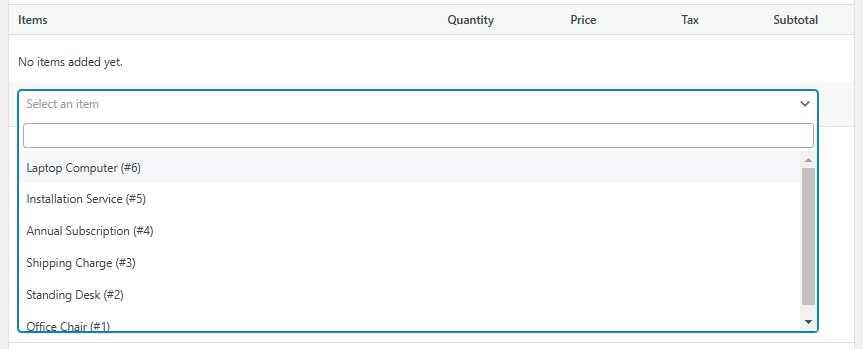
Click on the Select an Item Button:
- Choose an item from the dropdown menu.
- If the item doesn’t exist, you can quickly add it via Accounting > Items > Add New.
Adjust Item Attributes:
- Quantity: Enter the number of items. Changing the quantity adjusts the subtotal.
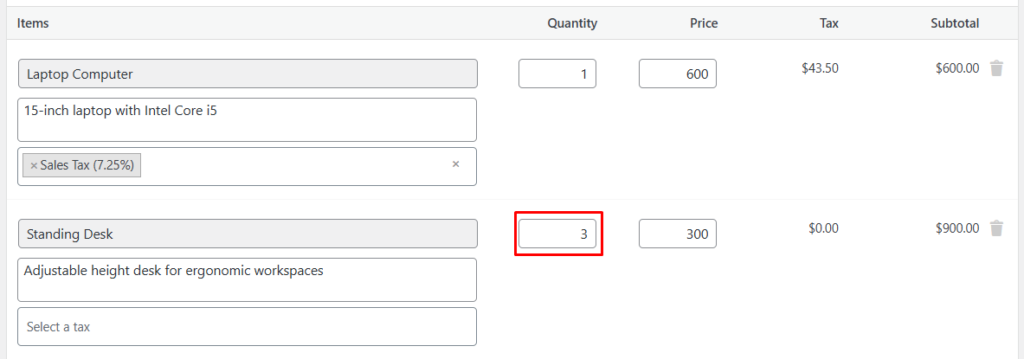
- Price: Review or adjust the unit price of the item. The price will be converted to the selected currency if it differs from the base currency.

- Tax: Apply applicable tax rates to the item. Pre-defined tax rates will populate automatically if set.

- Discount: Add discounts as either a fixed amount ($) or a percentage (%).

Review and Save the Invoice
- Double-check all entered details, including item quantities, prices, taxes, and discounts.
- Once satisfied, click Save to create the invoice.
- The new invoice will appear in the Invoices List for future reference.
Managing Invoices
Ever Accounting provides robust tools for managing your invoices:
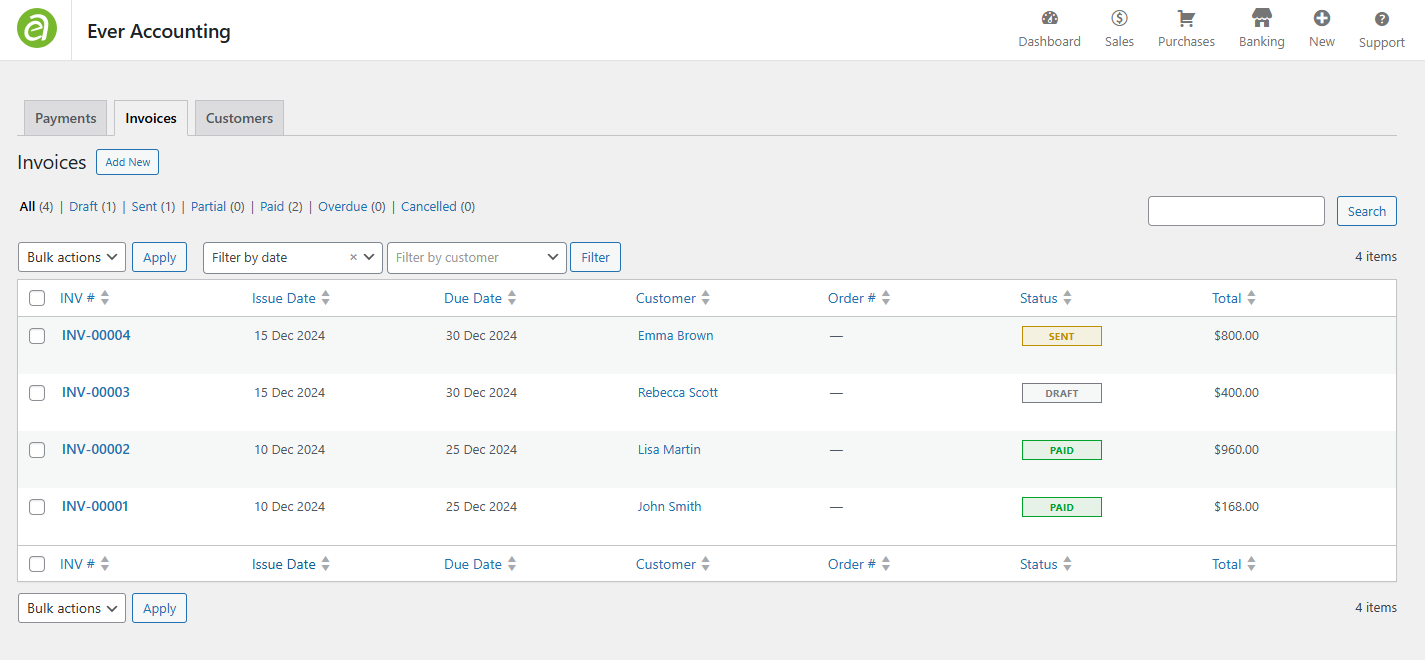
Invoice Listing
View all invoices under Sales > Invoices. Each entry displays the following details:
- Invoice Number: The unique identifier for the invoice.
- Customer Name: The name of the customer associated with the invoice.
- Issue Date: The date the invoice was issued.
- Due Date: The payment due date.
- Total Amount: The total amount of the invoice.
- Payment Status: The status of the payment (Draft, Sent, Partial, Paid).