The Sales Settings in Ever Accounting allow you to customize how payments and invoices are managed in your accounting system. These settings are divided into two sections: Options and Invoices. Follow the steps below to configure each tab effectively.
How to Access Sales Settings
- Log in to your Ever Accounting dashboard.
- Navigate to Settings > Sales.
- You will see two tabs: Options and Invoices.
Configuring the Options
The Options help you customize how payment numbers are automatically generated.
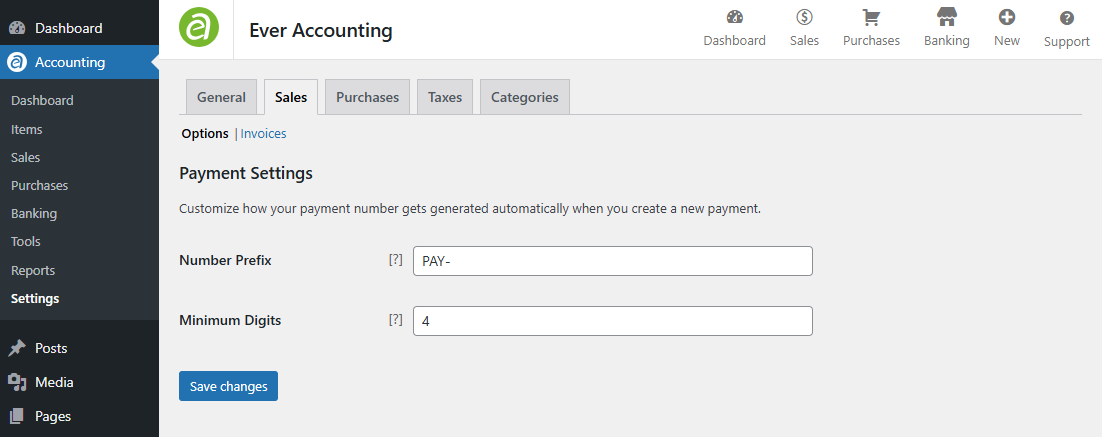
- Access the Options
Click on the Options Tab under Sales. - Customize the Following Fields
- Number Prefix
Enter a prefix to prepend to all payment numbers. - Minimum Digits
Specify the minimum number of digits for payment numbers.
- Number Prefix
- Save Changes
Once you’ve made your changes, click Save Changes to apply them.
Configuring the Invoice
The Invoices lets you customize how invoices are generated, including numbering format, due dates, default values, and column labels.
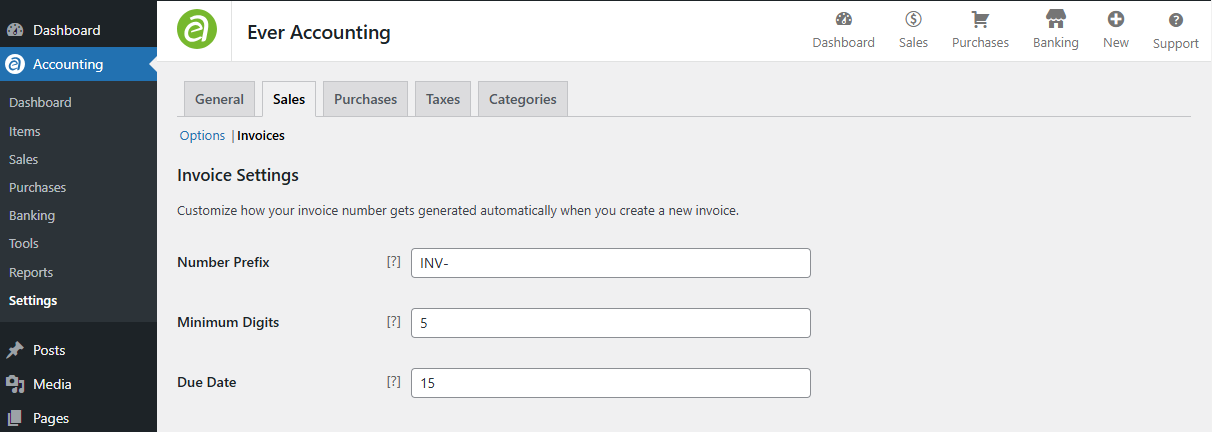
- Access the Invoices
Click on the Invoices under Sales. - Customize the Following Sections
Invoice Settings- Number Prefix
Enter a prefix for all invoice numbers. - Minimum Digits
Specify the minimum number of digits for invoice numbers. - Due Date
Set the default due date for invoices. Enter the days from the invoice creation date that the payment is due.
- Number Prefix
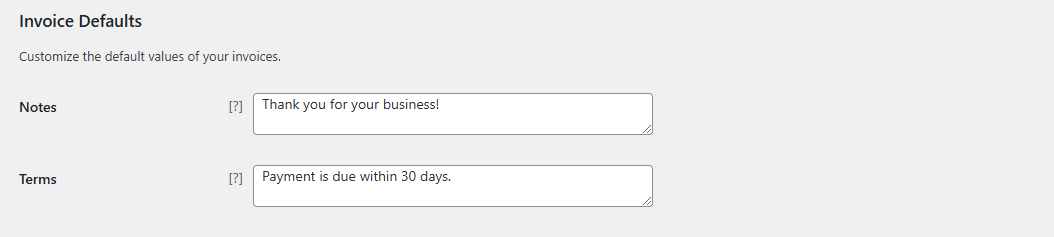
- Invoice Defaults
- Notes
Add a default note to appear on all invoices. - Terms
Define the default payment terms for invoices.
- Notes
- Invoice Columns
- Item Label
Customize the label for the item column. Default: Items. - Price Label
Customize the label for the price column. Default: Price. - Quantity Label
Customize the label for the quantity column. Default: Quantity. - Tax Label
Customize the label for the tax column. Default: Tax. - Subtotal Label
Customize the label for the subtotal column. Default: Subtotal.
- Item Label
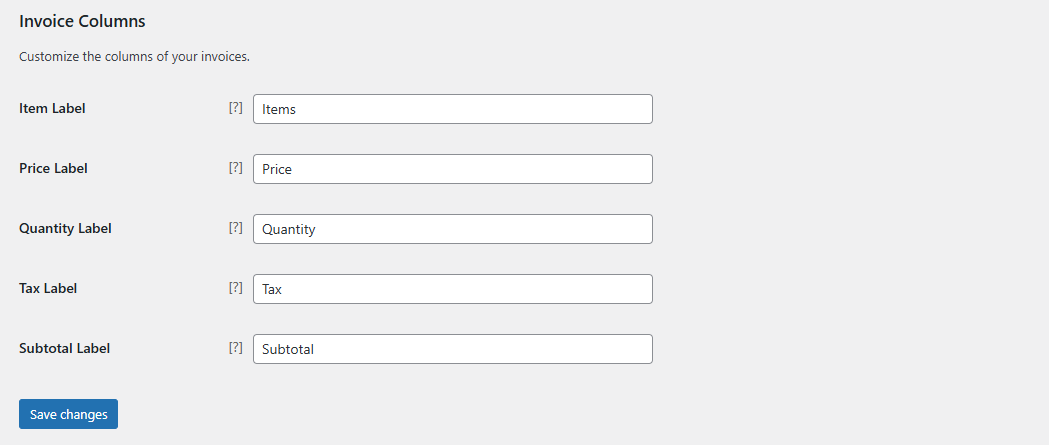
Save Changes
After making all necessary changes, click Save Changes to apply your customizations.