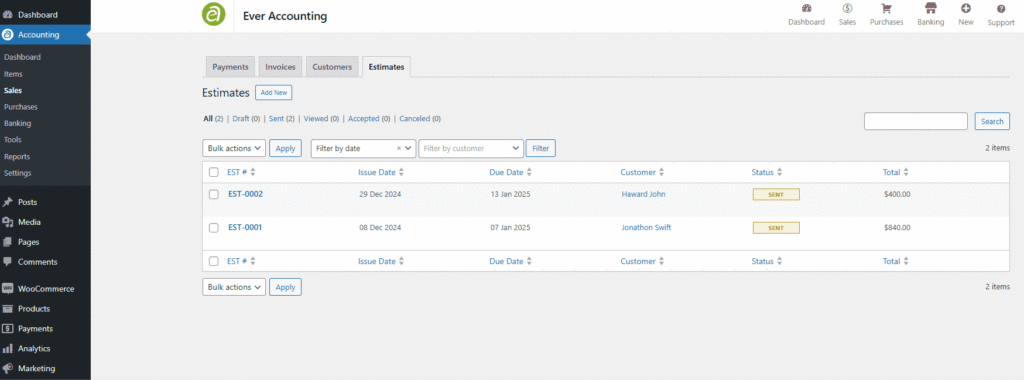
The Estimates feature in Ever Accounting allows you to create professional customer estimates. Follow the steps below to add a new estimate.
Steps to Add a New Estimate
- Navigate to the Sales menu in your Ever Accounting.
- Select the Estimates tab.
- Click the Add New button at the top of the page to create a new estimate.
Add Estimate Fields
When creating a new estimate, you will be prompted to fill out the following fields:
| Field | Description |
| Customer | Select the customer for whom the estimate is being created. |
| Issue Date | Set the date the estimate is issued. |
| Estimate Number | The unique identifier for the estimate is automatically generated based on your settings. |
| Due Date | Set the date by which the estimate is valid or due. Example: 2025-01-13. |
| Order Number | Enter a reference or order number for tracking purposes. |
| Currency | Choose the currency for the estimate. |
| Exchange Rate | Specify the exchange rate for the selected currency. |
Item Details
- Initially, no items are added to the estimate.
- Add items to the estimate, including product or service details, quantity, price, tax, and discounts.
Summary Fields
- Discount: Add a discount amount if applicable.
- Subtotal: Displays the total before discounts and taxes.
- Discount: Displays the total discount amount.
- Tax: Displays the total tax applied.
- Total: Displays the total estimate.
Notes and Terms
- Notes: Add a message or note for the customer.
- Terms: Define the terms and conditions of the estimate.
Save the Estimate
After filling in all required fields, click the Save button to finalize the estimate. The estimate will now appear in the Estimates list under the Sales menu.

Benefits of the Estimates Feature
- Professional Estimates: Create well-structured and clear estimates for your customers.
- Customizable Fields: Tailor each estimate with specific details and terms.
- Easy Management: Track and manage all estimates from a single dashboard.